Choose a fixed-width standing seam machine when one finished panel width supports most of your repeat production. Choose size-changing equipment when you regularly need several widths within a compatible seam profile and the complete width-change process fits your batch schedule.
The number of widths alone does not settle the choice. You also need to know how often orders switch widths, which tools move or change, and whether feeding, cutting and receiving can keep pace. Compare both options against the same order list before you commit.
Decide how many widths your orders require
Start with the finished widths you sell, then group orders by seam drawing and coil specification. Several catalog widths can still mean one stable main-width workload. A shorter width list can require frequent switches when small orders arrive together.
Drawing and width. Record finished cover width, seam cross-section and drawing revision. Keep different seam shapes on separate lines.
Batch size. List panel quantities, lengths and total meters by batch. Annual sales by width hide the size of each production run.
Coil requirements. Record material, thickness and coating. A material or color change can require another coil even when the panel width stays unchanged.
Sequence and due dates. Count the width switches your shipping schedule requires. Show where you can group similar orders and where customers need separate daily batches.
Keep feed width and cover width separate
The flat strip includes material used to form the seam edges. Ask for feed width and finished cover width on the selected profile drawing; cover width alone cannot establish the required strip width.
Same widths, two different workloads
For an illustrative comparison, suppose your orders require 304.8 mm (12 in), 406.4 mm (16 in) and 457.2 mm (18 in) cover widths.
How batch patterns change the equipment decision
Your order pattern
Configuration to compare
What changes the choice
Long, repeat batches at 406.4 mm; other widths are occasional.
A dedicated main-width line, with a practical route for the other widths.
Concentrated demand can keep one setup busy without routine width adjustment.
Small batches alternate among all three widths to meet daily shipping dates.
Size-changing equipment that can demonstrate the complete required width sequence.
One line must share capacity across repeated width switches; the full interruption matters.
Use a representative production period that includes normal work and known seasonal demand. Grouping batches can reduce width switches when delivery dates and inventory space allow it. Your width-by-batch schedule shows whether flexibility solves recurring work or mainly covers rare orders.
Compare fixed and size-changing architecture
A fixed-width setup keeps its forming arrangement dedicated to the quoted working width during normal production. A size-changing setup adjusts for other compatible widths. Retooling a dedicated setup for another width needs a separately defined scope.
Width changes and seam changes are separate
In a layout with movable forming sides, changing their spacing changes the pan width while the edge rolls retain the selected seam shape. Changing that spacing alone does not create a different lock shape or seam height.
Continuous adjustment. Establish whether every required width falls within the offered adjustment range for the selected drawing.
Preset positions. Identify which finished widths the quoted settings cover and how the assemblies move and lock at each position.
Tooling-dependent widths. Name any extra rolls, guides or cutter parts needed. Include their installation and setup in the comparison.
Fixed-width and size-changing equipment: what changes with your width mix
Decision factor
Fixed-width setup
Size-changing setup
What you verify
Width coverage
Dedicated to the agreed finished width in the quoted setup.
Agreed widths through a continuous range, preset positions or additional tooling, as quoted.
Every required cover width, corresponding feed width and drawing.
Change method
No routine width adjustment for the dedicated job; other widths need a separately quoted route.
Manual or powered positioning, with any remaining setup work.
Which movements are automatic and which tasks still require an operator.
Tooling
Forming and cutting tools matched to the dedicated section.
Width adjustment may retain seam rolls; a different seam can require other tooling.
Included rolls, guides, rib tools and cutter parts for each width/profile.
Material envelope
Capacity applies to the specified profile and coil conditions.
Capacity must cover each proposed width/material combination.
Material grade, thickness, coating and relevant mechanical properties.
Cutoff
Cutter matched to the formed section and length requirements.
Cutter must accommodate each width and any profile changes.
Adjustment or die changes, cut quality and whether cutting stops forming.
Buyer verification
Run the dedicated width on representative coil.
Run the required widths and demonstrate switches between them.
Good panels, complete change work, startup scrap and elapsed batch output.
Choose how to allocate your capacity
Keep one width dedicated. This suits recurring main-width work when occasional widths have another practical route. You avoid routine width-setting work on the dedicated line.
Share one adjustable line. This suits several recurring widths. The benefit depends on complete change work; powered positioning alone cannot remove coil loading or cutter adjustment.
Compare dedicated plus flexible capacity. Separate lines can support parallel production when the plant has enough space, handling and staff. Include those extra resources when comparing this route.
None of these arrangements establishes a universal price, speed or quality advantage. When you compare a standing seam roll forming machine, separate width adjustment from available seam profiles. A machine family can include several tooling packages; your offer should identify which package makes each ordered panel.
Check the width-change and tooling scope
Separate width positioning, profile-tool changes and coil handling. A controller can store lengths and quantities without moving the forming stands. Even when width positioning is powered, guides, rib rollers or cutoff components may still need separate work.
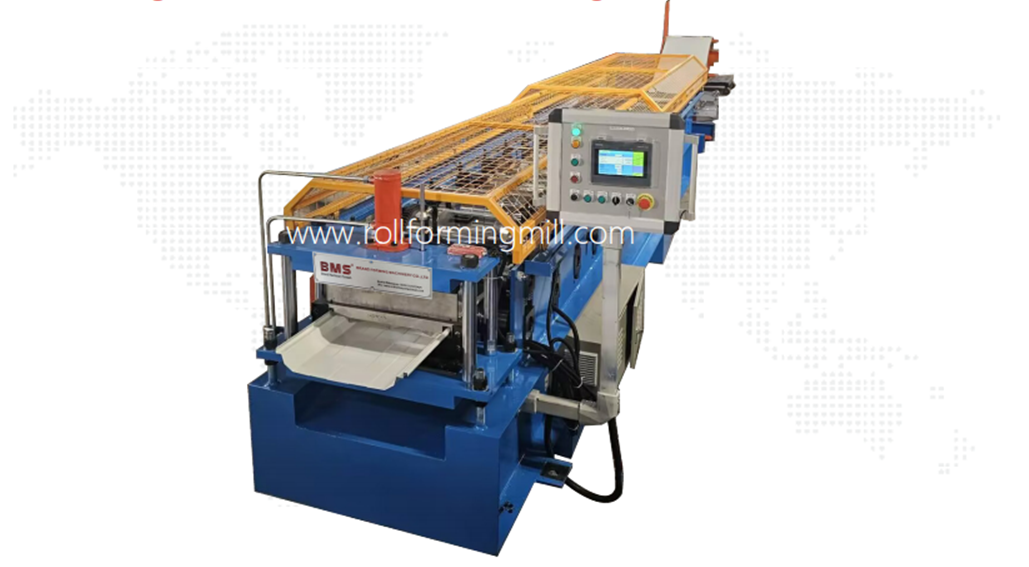
BMS offers a size-changing standing seam former under model designation YX65-300,435,500, with PLC control and hydraulic post-cutting. Use that designation to identify the equipment; confirm finished widths and material capability from the selected profile drawing. Have BMS identify the automatic width-setting functions and manual tasks in your proposed configuration.
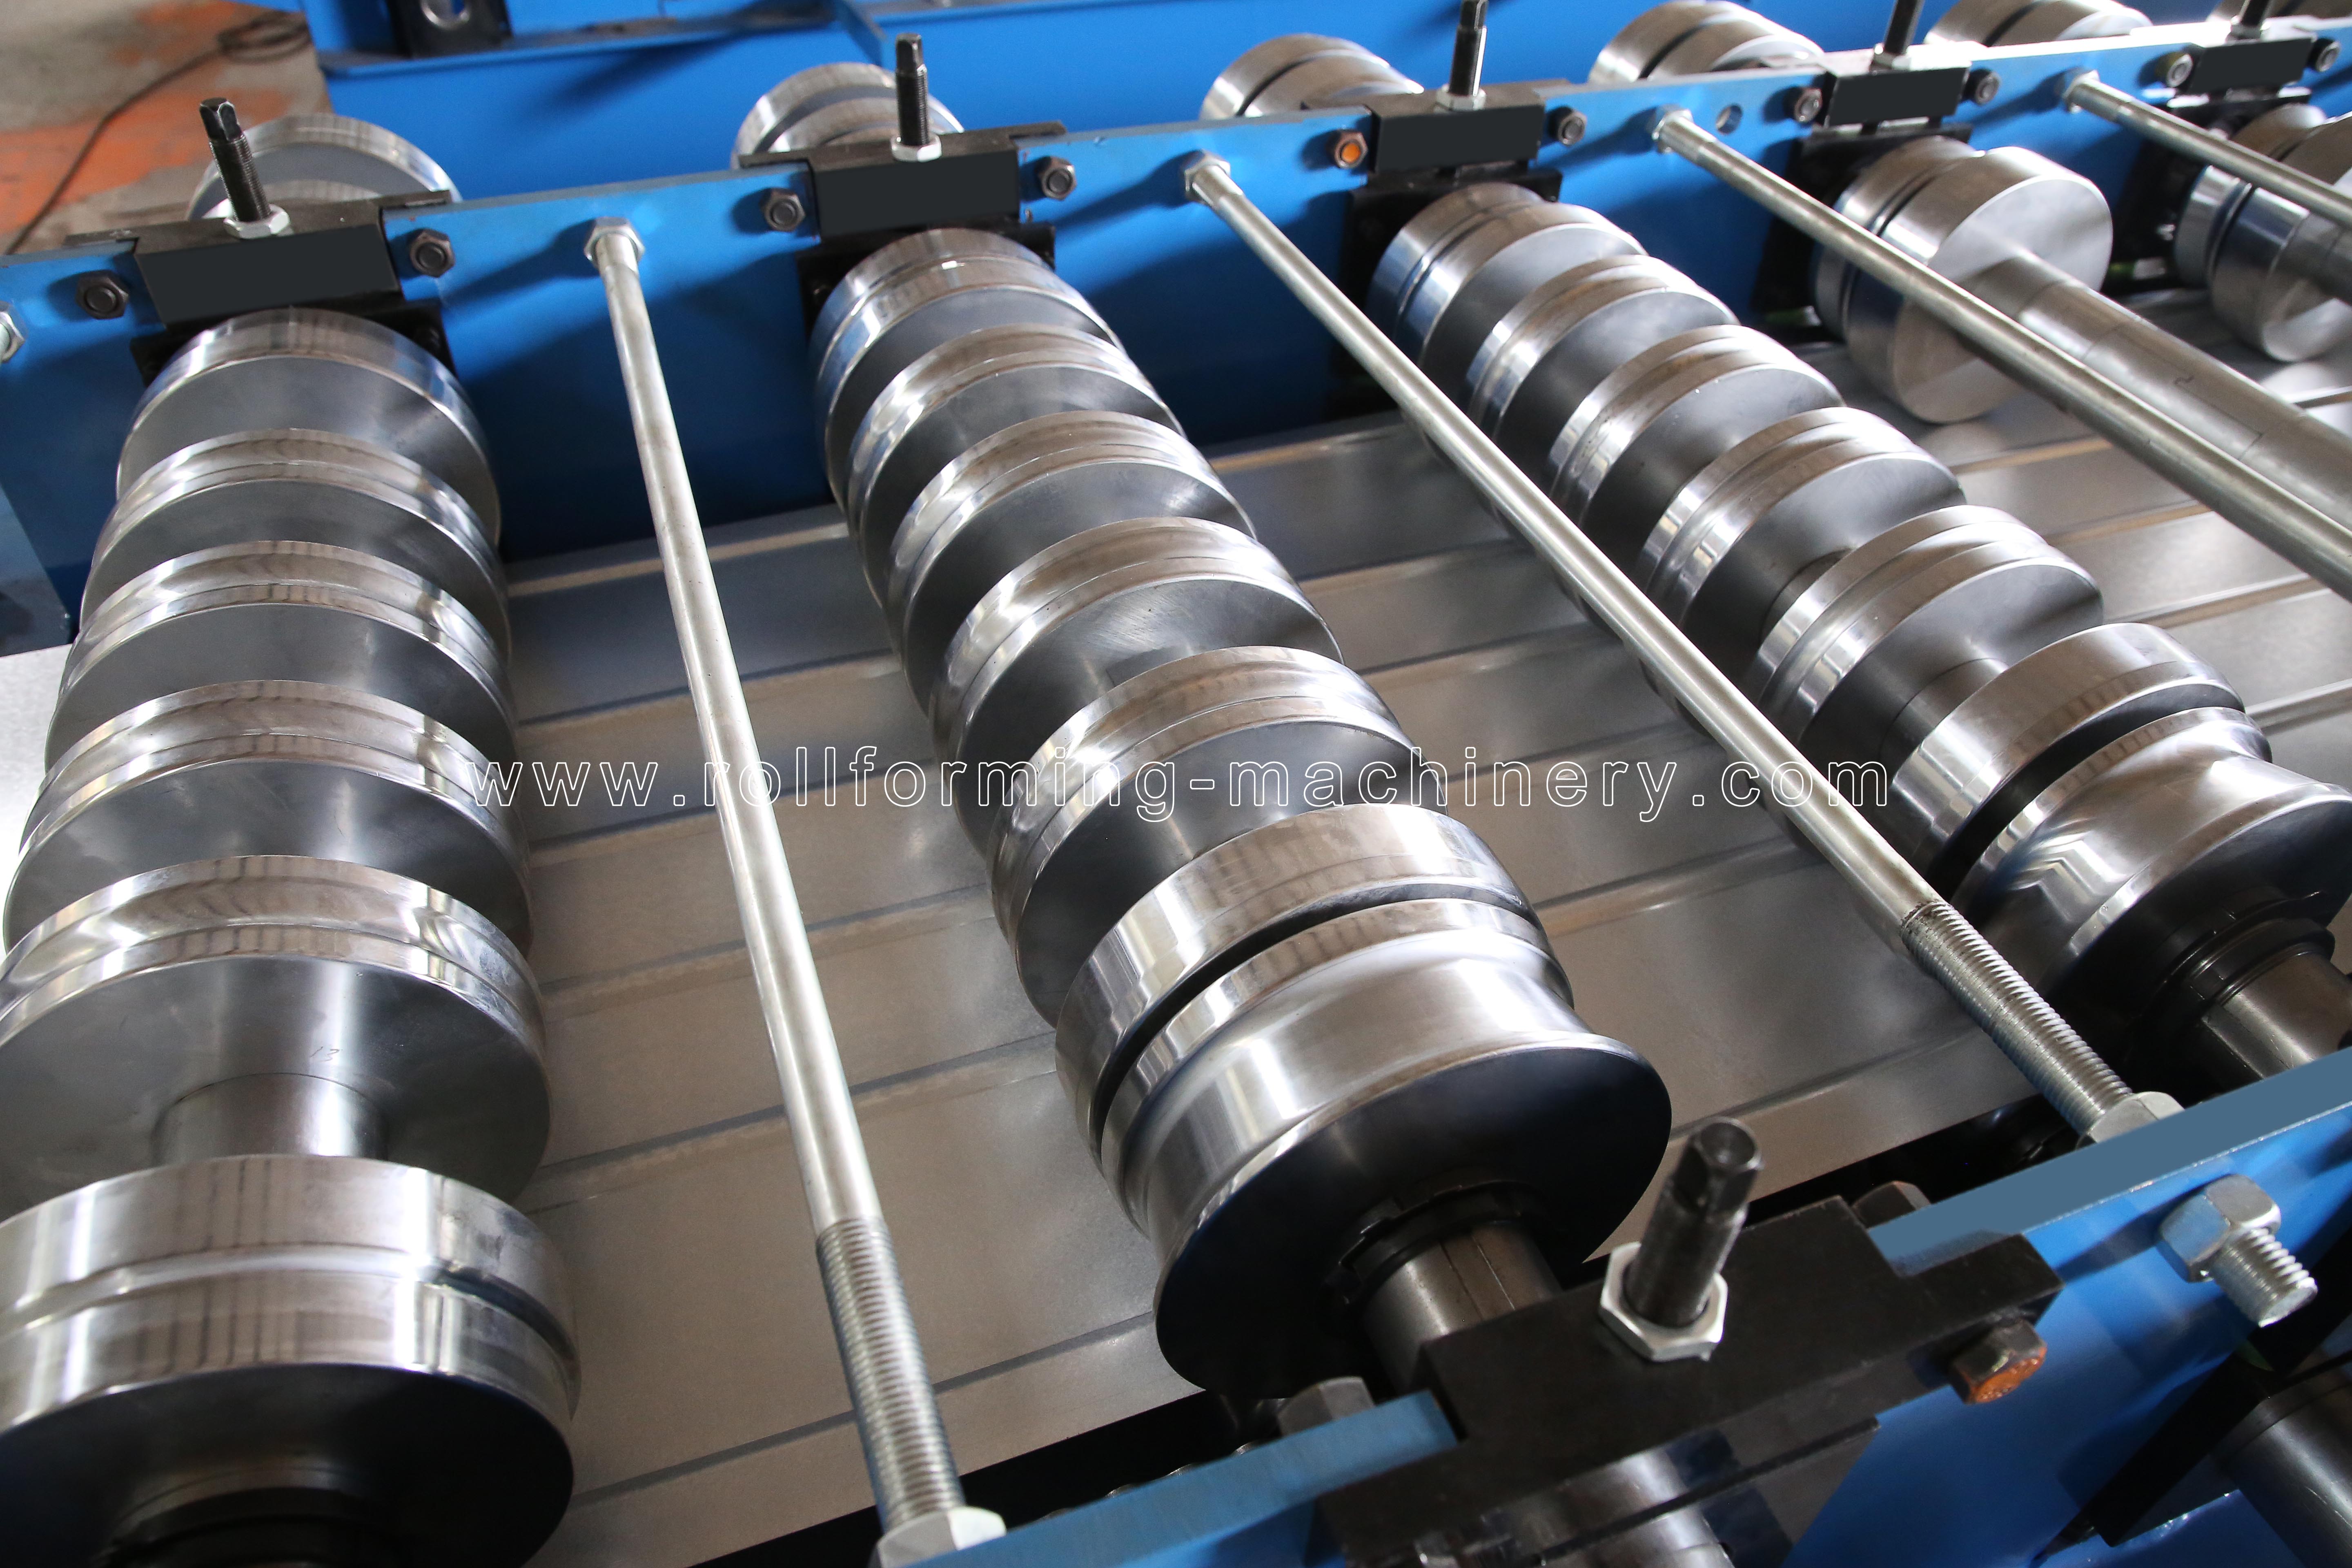
Shaped forming rollers mounted along the machine bed.
Identify what moves, adjusts or changes
Entry guides and forming sides. Find out which side moves, how positions are set and locked, and how the crew checks alignment after the move.
Seam rolls and surface features. Confirm whether the same rolls make the required edge geometry. Identify any separate setup for ribs, striations or other features across the panel face.
Cutoff tooling. Establish whether the cutter adjusts across widths, uses different inserts, or needs a different die. Include the work needed to restore a clean cut.
Coil supply and receiving. Include loading and centering the new strip, threading, and changing panel supports or stack arrangements.
Tie material capability to each drawing
Specify alloy or steel grade, actual thickness, coating and relevant strength data. A gauge label alone is insufficient.
Confirm each width/material combination for the selected seam drawing and offered tooling. Success in one material or seam does not establish another combination.
List width adjustment and a change to another seam as separate quotation items. Use the BMS model designation to identify equipment, then confirm the proposed capability.
Include safe access and energy control
OSHA’s 29 CFR 1910.212 addresses machine guarding; 1910.147 addresses hazardous energy during covered servicing and maintenance. Have your plant team assess the proposed tasks and follow the applicable energy-control procedure and machine manual. A saved recipe does not replace those precautions.
Measure the complete width interruption
Last acceptable panel at the old width. Start the timing boundary at saleable production, rather than at the width-positioning command.
Required change work. Include positioning, coil loading or threading, and any guide, rib or cutter setup that the transition needs.
Alignment and trial pieces. Keep adjustments, startup material and cut checks within the interruption.
First acceptable panel at the next width. End the interval when the selected drawing and cut requirements are met. Record crew size and overlapping work.
Compare whole-line output constraints
Compare the same cut list through each complete line. Use accepted panels or accepted meters per elapsed hour, with the width and length mix stated. Feeding, cutting and receiving must all support the output you need.
Find the constraint behind the quoted forming speed
Constraint
Effect of your order mix
What to compare
Cutting cycle
If forming pauses for each cut, short panels add more stop-and-cut cycles per meter.
Demonstrate whether the proposed post-cutting arrangement stops the strip. Hydraulic power alone does not establish continuous production.
Coil supply
A width, grade, thickness or color change can require another coil.
Compare decoiler/loading arrangements, threading work and space to stage the next coil. Automatic width positioning does not load a coil.
Panel receiving
Short pieces create more collection events; long panels need supported runout and a clear route to stacking.
Observe whether the crew and receiving equipment can clear panels at the required rate. A waiting former loses useful output.
Calculate the effect of cutting pauses
Illustrative batch. 100 panels at 6 m (approximately 236.22 in) each.
Assumed forming rate. 20 m/min, used only for this calculation.
Assumed cutting pause. One separate 6-second pause per panel, with no overlap between forming and cutting.
Form the batch. 100 × 6 m = 600 m. At the assumed rate, 600 ÷ 20 = 30 minutes of forming.
Add separate cutting pauses. 100 × 6 seconds = 600 seconds, or 10 minutes.
Compare the combined subtotal. 30 + 10 = 40 minutes. For those two sequential operations, 600 ÷ 40 = 15 m/min.
Use the same finishing point
The example excludes coil loading, width changes, startup scrap, inspection and receiving delays. Replace assumptions with observations and avoid adding overlapping time twice. Compare the same crew and batch order; distinguish loose-panel output from packed bundles before comparing capacity and costs.
Check your actual site electrical supply
Give the supplier your actual voltage, phase, frequency, available service capacity and plant requirements.
Have your facilities electrician compare these with the electrical documents for the former, hydraulics and quoted handling equipment.
Confirm the complete offered line against your site data; do not assume a standard US supply fits every configuration.
Request a width-specific trial and quotation
Request a trial that follows a realistic width sequence, including a return to a previously run width. A single sample at the easiest setting cannot show whether the line serves your mixed orders. Agree on panel dimensions, cut quality and surface condition before the run.
Choose representative combinations. Select the required narrow and wide panels, recurring intermediate widths, and material/thickness combinations that challenge the proposed configuration. Include different seam drawings only when they are part of the purchase.
Run actual batch lengths. Include short and long pieces from your length range. Observe how cutting, panel support and collection work, rather than watching only continuous strip through the rolls.
Watch the complete width switch. Record the last acceptable panel, each operator task, coil changes, trial material and the first acceptable panel at the next width. Note crew size and work that occurs in parallel.
Check the return setting. Run the earlier width again and compare its critical dimensions and cut ends with the agreed drawing. Where relevant, check mating panels and specified clips using the roof-system requirements.
Inspect the panels and account for the material
Measure cover width at the drawing’s stated reference points. Check seam-leg geometry and panel length against agreed drawing- and material-specific tolerances.
Inspect cut-end distortion and coating marks, including panels made after each width switch and after returning to the earlier setting.
Record acceptable output, rejected pieces and startup scrap separately so a quick change does not conceal unusable panels.
Identify any substitute trial coil and the material combinations that still need to be demonstrated. Compare repeatability as well as speed.
Send the same RFQ inputs to each supplier
Seam drawing and revision, including the finished-width measuring points.
Every required finished width and its matching feed width once confirmed.
Coil material, grade, thickness, coating and relevant mechanical properties.
Batch size by width, including lengths, quantities and total meters.
Minimum and maximum panel lengths, with typical cut lists.
Width-change frequency and the batch sequence you need to run.
Actual site voltage, phase, frequency and available service capacity; request electrical documents for all included equipment.
Separate the quotation into comparable groups
Machine and forming tools. Identify included width settings, seam tooling and extra tools. Show future-width provisions separately from the initial purchase.
Cutting, controls and handling. List cutter components, control functions, decoiler and receiving equipment. Identify the manual tasks included in the quoted width-change routine.
Delivery and ongoing support. Itemize freight, installation, training, spares, warranty and service terms. Ask each supplier to price the same purchase scope.
Frequently Asked Questions
Should you buy for widths you do not yet sell?
Separate confirmed orders from possible future work. Ask which future widths would use the proposed adjustment system and which would need new tooling or another machine; compare that cost and scope before paying for unused capacity.
Does size-changing equipment automatically make tapered panels?
No. Adjusting between parallel panel widths does not establish the ability to vary width along a panel’s length. If you need tapered work, provide the taper drawing and ask for the required slitting, forming and handling arrangement as a separate capability.
Choose the line for your recurring width mix
Base your purchase on repeat orders and a complete width-switch demonstration. A dedicated line can suit steady main-width work; adjustable equipment earns its place when recurring mixed widths need shared capacity. Keep future options separate from the widths and tooling you need in the initial purchase.
Email BMS at info@rollformingmill.com with your seam drawing, finished widths, coil material and thickness, batch size by width, length range and change frequency. Request a drawing-specific configuration and an itemized quotation for the machine, tooling, delivery and support.
Founded in 1992, BMS Machinery joined XIAMEN BMS GROUP in 2017. Our manufacturing network in China includes 8 factories, 6 machining centers and 1 steel structure company, covering over 30,000 m². Supporting credentials include ISO9001:2015 quality management certification and SGS-issued CE/UKCA machinery compliance verifications. XIAMEN BMS GROUP’s Dun & Bradstreet D‑U‑N‑S Number is 55-379-8879.

 日本語
 한국어
 ไทย
 繁體中文
 العربية
 فارسی
 Français
 Русский
 Español
 Português
 English
 Deutsch
 italiano
 Nederlands
 Tiếng Việt
 Polski
 Türkçe
 አማርኛ
 ພາສາລາວ
 ភាសាខ្មែរ
 Bahasa Melayu
 ဗမာစာ
 தமிழ்
 Filipino
 Bahasa Indonesia
 magyar
 Română
 Čeština
 Монгол
 қазақ
 Српски
 हिन्दी
 Kiswahili
 Slovenčina
 Slovenščina
 Norsk
 Svenska
 українська
 Ελληνικά
 Suomi
 Հայերեն
 עברית
 Latine
 Dansk
 اردو
 Shqip
 বাংলা
 Hrvatski
 Afrikaans
 Gaeilge
 Eesti keel
 Māori
 සිංහල
 नेपाली
 Oʻzbekcha
 latviešu
 অসমীয়া
 Беларуская мова
 Esperanto
 मराठी
 پښتو